

·
Jul 10, 2025
Even Beginners Can Do This! How to Use UV Resin: A Step-by-Step Guide to Crafting—No Missteps
Gather Your Supplies First—Don’t Get Stuck Mid-Project
You’ll want these items ready before you start. Skip one, and you might find yourself scrambling halfway through:
UV resin: Steer clear of cheap, generic bottles—they often cure unevenly or stay tacky. Beginners should stick with clear, trusted brands (like Bond Craftor)—they cure nice and glossy with way fewer bubbles.
Curing light: Go for a UV lamp or UV flashlight, and don’t skimp on wattage—24 W or higher is best. I swear by the SUNUV 24 W model; it’s the perfect size for earring molds, hits every spot evenly, and avoids shadowy corners. If you make slightly larger pieces often, a double-sided lamp is a game-changer—cures from top and bottom, so you don’t have to flip your work.
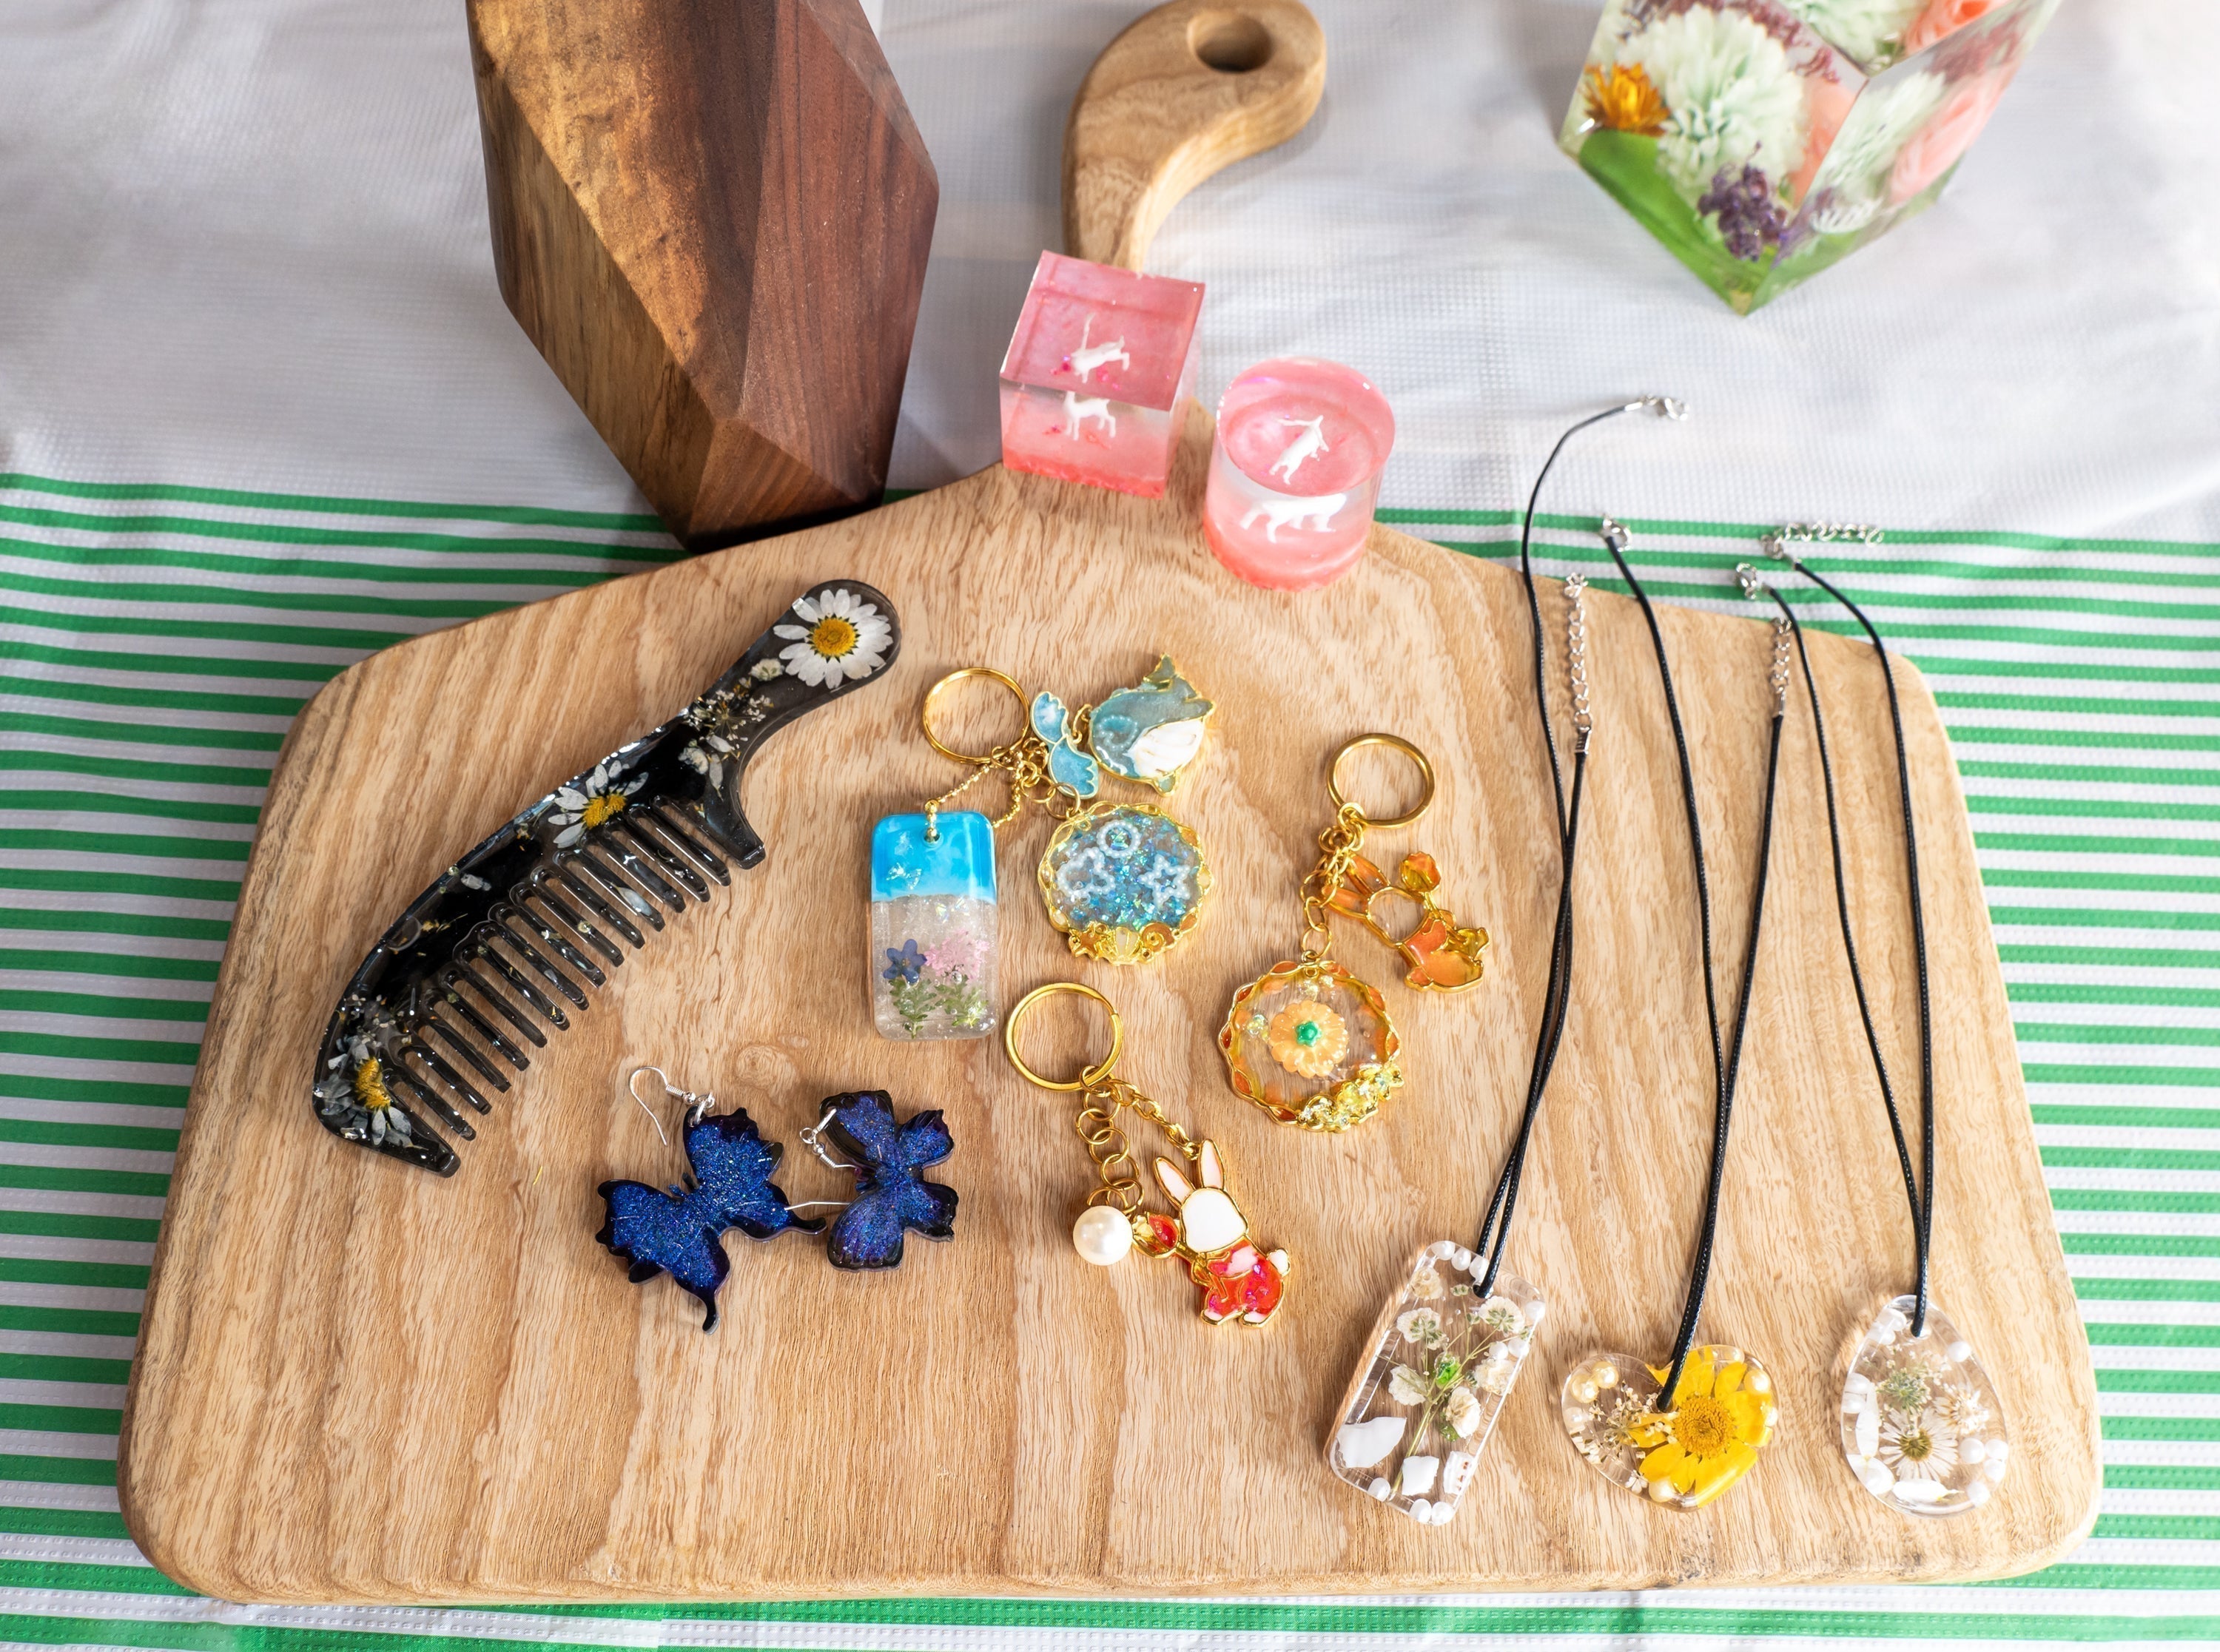
Molds: Start with silicone molds—they’re flexible, so once your piece is set, you just flex the mold and it pops right out (no frustrating sticking). Stick to simple shapes first: small earring blanks, tiny flowers, or keychain molds. Save the intricate designs for when you’re more comfortable.
Extras you might want:
For color, grab resin-specific pigments (skip craft paints—they clump and mess up curing).
To add flair, stock up on glitter, dried pressed flowers, or mini beads (make sure dried flowers are fully dry—moisture will ruin your piece).
Tools: Disposable cups (for mixing colors), popsicle sticks (for stirring—toss ‘em after, no cleanup hassle), small tweezers (for placing tiny decorations—even shaky hands can nail it).
Don’t forget protection: Disposable gloves (resin is a pain to wash off and can irritate skin) and a mask (the fumes are mild, but it’s still a chemical—better safe than sorry).
7 Steps to Nailing UV Resin Crafts—Follow These, and It’ll Turn Out Great
It’s as easy as playing with clay—just take it step by step, and you’ll avoid mishaps:
Step 1: Prep Your Workspace—Cleanup Will Thank You Later
UV resin dries rock-hard, and once it’s on your table or floor? Good luck scraping it off. Lay down a plastic drop cloth, old newspaper, or cardboard first. Set all your supplies on top—this way, if you spill, you can just roll it up and toss it. No scrubbing required.
Step 2: Want Color? Stir Slow When Mixing
If you’re going for colored pieces (think pink earrings or blue charms), grab a disposable cup, pour in a small amount of UV resin (mix only what you need—leftover resin goes to waste), add 1-2 drops of pigment, and stir gently with a popsicle stick.
Pro tip: Avoid stirring like a maniac! Aggressive mixing traps tons of tiny bubbles, leaving your piece looking bumpy. Stir slow and steady in circles until the color is even, then let it sit for 60 seconds. Small bubbles will rise to the surface—pop the big ones with the tip of your stir stick.
Sticking to clear? Skip this step—you’re good to go.
Step 3: Pour Resin into the Mold—Don’t Overdo It
Set your mold on a flat surface (tilting = spills). Pour the resin slowly—no rushing. Here’s the golden rule: Never pour more than 3-4 mm thick in one go. Too thick, and the UV light can’t penetrate— the middle will stay goopy, like undercooked cake.
For thicker pieces (say, a 5 mm pendant), work in layers: pour 2 mm first, cure it, then pour the remaining 3 mm. Let each layer cure fully before adding the next—patience pays off here.
Step 4: Add Decorations Gently—No Roughhousing
If you’re adding dried flowers, glitter, or beads, do it while the resin is still wet. For example, making a dried flower earring: pour a thin layer of resin, place the flower, and nudge it gently with tweezers (no pressing hard—you don’t want it to sink). Then pour a tiny bit more resin to cover the flower—this keeps it from lifting later.
Move slowly when placing decorations—no poking or stirring. If bubbles pop up, either pop them with your stir stick or blow a soft breath over the mold (through your mask, of course)—bubbles rise faster that way.
Step 5: Cure with UV Light—Don’t Skimp on Time
Set the mold under your UV light, about 4-6 inches away—not too far (the light won’t reach), not too close (you might scorch the edges). Turn it on and let it work. Timing depends on thickness:
Thin layers (3 mm or less): 1-2 minutes is plenty.
Thicker layers or layered pieces: 3-5 minutes per layer. After curing, test it with a toothpick—if it’s hard and doesn’t stick, you’re good. If it’s still soft, give it another minute.
Don’t cut corners on time—undercured pieces stay sticky and break easily, and that’s just a waste of effort.
Step 6: Demold Gently—Molds Are Reusable
Once it’s cured, flip the mold over and gently flex the edges (silicone is tough—you won’t break it). Your piece should pop right out with a little nudge. If it’s stuck, wiggle the mold side to side—no yanking or scraping, or you’ll scratch your work.
Rinse the mold with soap and water after, dry it off, and it’s ready for next time—no need to buy new ones.
Step 7: Fix Small Flaws—Polish It Up
If edges are a little rough, smooth them out with fine sandpaper (400 grit or higher), then wipe with a soft cloth—good as new. Tiny surface bubbles? Sand ‘em down lightly, then hit it with the UV light for a few seconds to bring back that glossy finish.

Avoid These Mistakes! I Tested Them So You Don’t Have To
I made plenty of blunders when I started—here are the most common ones to dodge:
Still tacky after curing? Chances are your lamp’s too weak (like a wimpy 10W model) or you didn’t cure it long enough. Upgrade to a 24W+ lamp, cure each layer an extra minute, and let it sit in a cool, dark spot for 10 minutes after—this usually fixes stickiness.
Tons of bubbles? You probably poured too fast, stirred too hard, or manhandled the decorations. Next time, pour slowly, stir gently, and handle decorations with care—bubbles will drop way off.
Cloudy instead of clear? Either your mold was dirty (oils or dust) or you used cheap resin. Wash molds with soap first, dry ‘em well. And for resin? Skip the bargain bins—good clear resin should look like glass when cured.
Stuck to the mold? Your mold might be old (silicone hardens over time) or you poured too much (resin overflowed and stuck). New molds: rinse with water first. Pour less—leave a 1 mm gap from the mold edge.
Final Thought: Slow and Steady Wins the Race
UV resin feels fast, but rushing ruins it. Pouring too thick, skimping on cure time, or stirring like a tornado—small slip-ups make a big difference.
Beginners, start simple: clear keychains, basic earrings. Get comfortable, then play with colors or decorations. Do it a few times, and you’ll get the hang of it. You’ll realize: this stuff is a game-changer—easier than glue, and it makes adorable, gift-worthy pieces (or just cute treats for yourself).
Go give it a try! Snap a photo when you’re done—I’d love to check it out.