

·
Mar 16, 2025
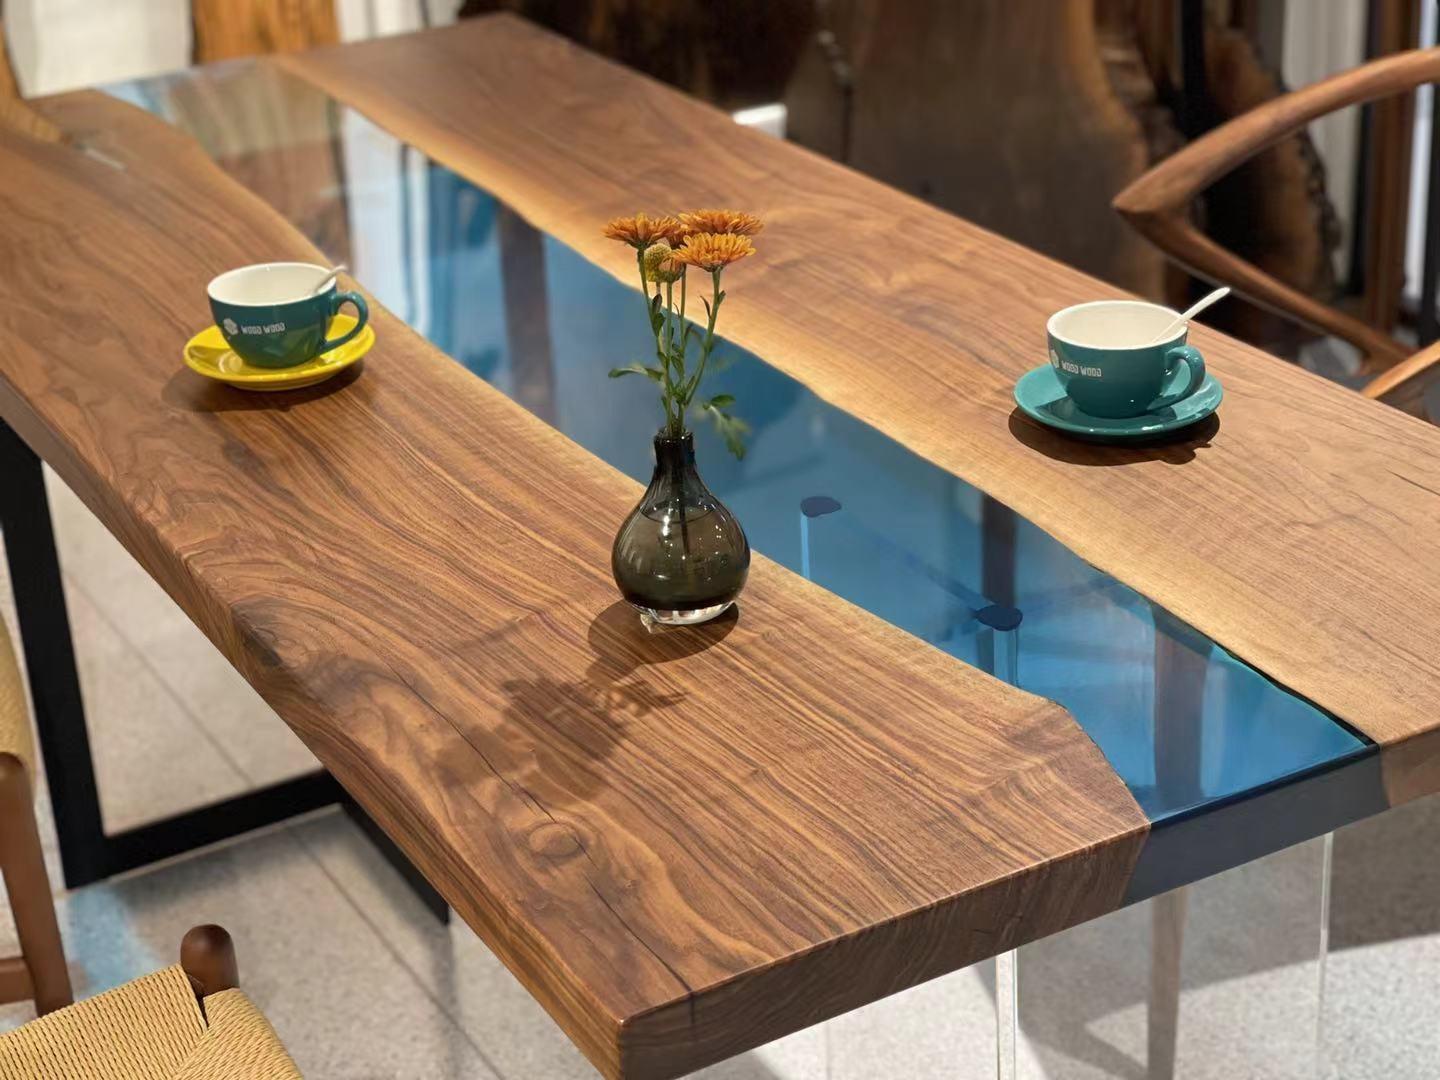
Mastering the Fusion of Wood and Epoxy Resin: A Comprehensive Guide to Eliminating Bubbles and Cracks
The art of combining wood and epoxy resin has revolutionized modern craftsmanship, creating stunning furniture, river tables, and decorative pieces. However, achieving a flawless bond between these materials requires meticulous attention to detail. This guide explores professional techniques for wood-epoxy fusion while addressing critical challenges like bubble-free epoxy pours and preventing cracks in resin projects.
Why Wood and Epoxy Resin Make Perfect Partners
Epoxy resin enhances wood's natural beauty by:
- Creating durable, waterproof surfaces
- Stabilizing porous structures
- Enabling creative color effects
- Adding structural reinforcement
Despite these benefits, improper techniques often lead to:
- Unsightly air bubbles
- Stress-induced cracks
- Delamination issues
- Cloudy finishes
Let's explore solutions to these common epoxy woodworking challenges.

Stage 1: Material Preparation – Foundation for Success
A. Wood Selection and Treatment
- Choose stable hardwoods (walnut, oak, maple)
- Kiln-dry wood to <12% moisture content
- Seal end grains with thin CA glue
- Remove all bark and loose fibers
Pro Tip: Stabilize punky wood with pentacryl wood hardener before resin application.
B. Epoxy Resicn Essentials
- Use deep-pour resins (≥2" per pour)
- Opt for UV-resistant formulas
- Verify 1:1 vs. 2:1 mixing ratios
- Check pot life (45-60 minutes ideal)
Recommended Products:
- TotalBoat TableTop
- ProMarine Supplies Deep Pour
- MAS Coatings Ultra Clear

Stage 2: The Bubble Elimination Process
Understanding Bubble Formation
Air becomes trapped through:
- Improper mixing
- Wood porosity
- Rapid curing
- Temperature fluctuations
Step-by-Step Bubble Prevention
-
Wood Preparation
-
Vacuum chambers: Remove 98% of internal air
- Stabilize at 70°F/21°C for 24 hours
- Apply seal coat (1:10 resin/hardener ratio)
-
-
Mixing Techniques
-
Use flat paddle mixers
- Stir at 300 RPM for 4 minutes
- Scrape container walls thoroughly
-
-
Degassing Methods
-
Vacuum chambers (25-29 Hg for 10 mins)
- Heat guns (120°F/49°C surface temp)
- Torch passes (2-3" above surface)
-
-
Pouring Protocol
-
Maintain 70-80°F environment
- Angle pours at 45°
- Layer deep pours in ½" increments
-

Stage 3: Crack Prevention Strategies
Understanding Epoxy Shrinkage
Resin contracts 2-4% during curing, creating internal stresses. Combine with wood's natural movement, and cracks become likely without proper precautions.
Five Crack Prevention Techniques
-
Thermal Control
-
Maintain 75-85°F during cure
- Use heating blankets for large projects
- Avoid direct sunlight curing
-
-
Reinforcement Methods
-
Fiberglass mesh between layers
- Carbon fiber rods in stress points
- Microsphere additives (3% by volume)
-
-
Layered Pouring
-
Maximum ½" per layer
- 6-8 hour recoat windows
- Sand between layers (120 grit)
-
-
Flexibility Additives
-
Urethane modifiers (5-10%)
- Silicone oils (limited to 0.5%)
- Polyamine adducts
-
-
Post-Cure Conditioning
-
7-day gradual cooling period
- Humidity control (40-60% RH)
- Vibration isolation platforms
-

Advanced Troubleshooting Guide
| Problem | Solution |
|---|---|
| Surface fish eyes | Pre-clean with denatured alcohol |
| Amber discoloration | Use UV-inhibited resins |
| Tacky surfaces | Recoat with 10% amine blush remover |
| Edge separation | Router ¼" channel for mechanical lock |
| Thermal shock cracks | Anneal at 150°F for 4 hours |
FAQs
Q: How long does epoxy take to cure on wood?
A: Full cure requires 7-14 days, though sandable surfaces form in 12-24 hours with fast-cure resins.
Q: Can you epoxy over fresh wood?
A: Never apply to wood with >15% moisture content – use moisture meters for verification.
Q: What’s the best epoxy for wood projects?
A: Deep-pour marine-grade epoxies outperform craft resins for bubble-free wood resin art.
Q: How to fix cured epoxy bubbles?
A: Drill micro holes, inject fresh resin, then sand/polish – prevention remains better than cure.
Conclusion: Keys to Perfect Wood-Resin Fusion
Mastering epoxy resin woodworking techniques demands understanding material science and precision execution. By:
- Controlling environmental factors
- Implementing phased pouring
- Utilizing proper degassing tools
- Selecting compatible materials
Craftsmen can achieve gallery-quality results. Remember – patience in preparation prevents perpetual problems. Document your process, track variables, and soon you'll create flawless epoxy-wood creations that stand the test of time.