DIY epoxy resin art has taken the crafting world by storm. Many artists and hobbyists love creating beautiful, functional pieces like resin drink coasters. The appeal lies in the creativity and satisfaction of making something unique. The Bond Craftor Epoxy Resin Kit makes this process even more exciting. This kit offers a crystal-clear finish and professional-grade results. You can easily create stunning resin drink coasters with this user-friendly kit. Dive into the world of epoxy resin art and unleash your artistic potential.
Materials Needed for Resin Drink Coasters
Creating your own resin drink coasters can be a fun and rewarding experience. You'll need some essential supplies and optional tools to get started.
Essential Supplies
Bond Craftor Epoxy Resin Kit
The Bond Craftor Epoxy Resin Kit is perfect for crafting stunning coasters. This kit offers a crystal-clear finish with minimal bubbles. You’ll find the 1:1 mixing ratio easy to handle. The resin cures quickly, allowing you to see results in no time.
Molds for Coasters
Silicone molds work best for shaping your coasters. These molds allow easy removal once the resin cures. You can find various shapes and sizes to match your style.
Additional Decorative Items
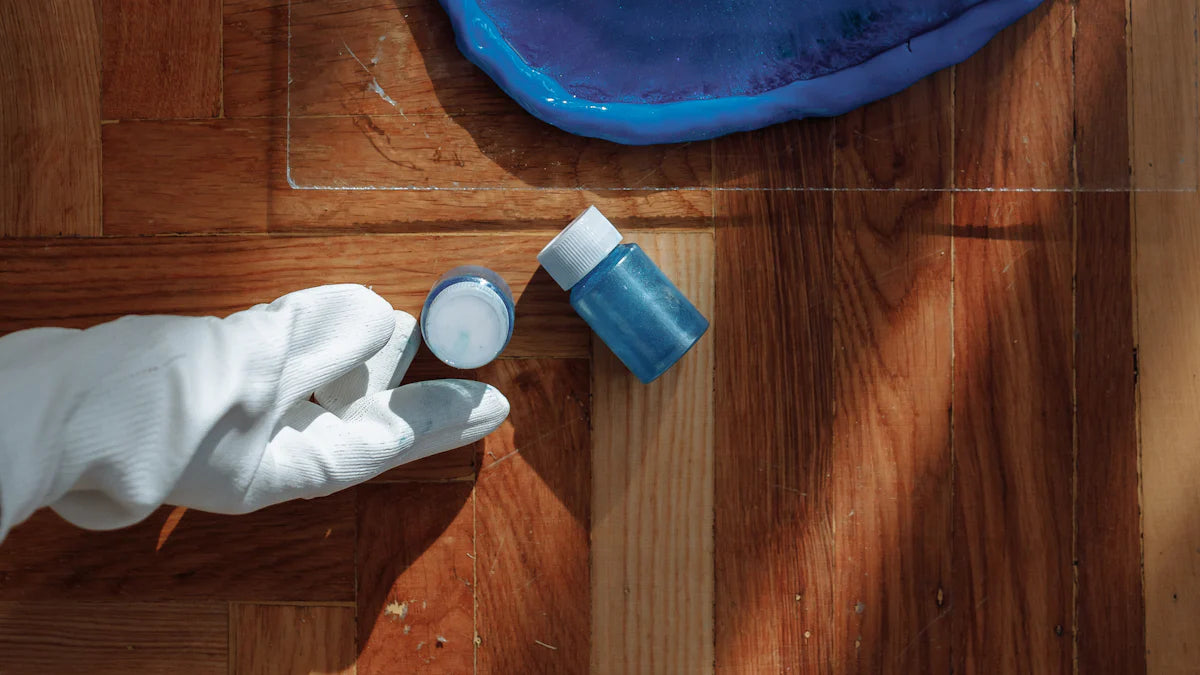
Decorative items add a personal touch to your coasters. Consider using pigments, glitter, or dried flowers. These elements will make your epoxy resin art unique and eye-catching.
Optional Tools
Measuring Cups
Accurate measurements ensure the best results. Use measuring cups to mix the resin and hardener precisely. This step helps maintain the quality of your resin drink coasters.
Stirring Sticks
Stirring sticks help mix the resin thoroughly. A slow and steady stir reduces bubbles. Wooden sticks work well for this task.
Safety Gear
Safety gear keeps you protected while crafting. Wear gloves and masks to avoid skin contact and inhalation. Ensure your workspace stays safe and clean.
Preparing Your Workspace for Epoxy Resin Art
Creating a safe and efficient workspace is crucial for successful epoxy resin art. Let's dive into how you can set up your area and ensure safety while making those stunning resin drink coasters.
Setting Up
Choosing a Well-Ventilated Area
Always choose a well-ventilated area for your epoxy resin projects. Fresh air helps reduce fumes from the resin, keeping your environment healthy. Open windows or use fans to maintain airflow. This step ensures a comfortable crafting experience.
Protecting Surfaces
Protect surfaces to avoid accidental spills or damage. Use plastic sheets or old newspapers to cover tables and floors. This layer acts as a barrier against resin drips. Cleanup becomes easier with this simple precaution.
Safety Precautions
Wearing Gloves and Masks
Safety gear is essential when working with epoxy resin. Wear gloves to protect your skin from direct contact. Masks prevent inhalation of any fumes. These items keep you safe during the crafting process.
Ensuring Proper Ventilation
Ensure proper ventilation throughout your workspace. Good airflow minimizes exposure to any potentially harmful substances. Fans or open windows help circulate air effectively. This practice enhances both safety and comfort.
Scientific Research Findings:
Cured epoxy resins are safe materials, even in contact with human cells. This makes them ideal for crafting purposes.
Epoxy resins boast excellent chemical resistance and strength. The curing process plays a vital role in achieving these properties.
By following these steps, you create a safe and efficient environment for your epoxy resin art. Enjoy crafting beautiful resin drink coasters with peace of mind.
Mixing the Resin
Mixing resin is a crucial step in creating beautiful resin drink coasters. Proper mixing ensures the resin cures correctly and achieves a flawless finish. Let's dive into the process of mixing resin and hardener.
Understanding the 1:1 Ratio
The Bond Craftor Epoxy Resin Kit uses a 1:1 ratio. This means you need equal parts of resin and hardener. Accurate measurement is key to success.
Measuring the Resin and Hardener
Use measuring cups for precise measurements. Pour the resin into one cup and the hardener into another. Ensure both liquids reach the same level. Precision here sets the foundation for a successful project.
Mixing Thoroughly
Combine the resin and hardener in a larger container. Stir the mixture slowly with a wooden stick. A slow stir helps prevent bubbles. Mix until the solution looks clear and uniform. Incomplete mixing can lead to tacky surfaces or uneven curing.
Expert Testimony:
“It’s good to know that your resin could be not fully cured if it’s not mixed with the hardener thoroughly.”
Tips for Success
Achieving the perfect mix involves more than just combining ingredients. Here are some tips to ensure your epoxy resin art turns out beautifully.
Avoiding Bubbles
Bubbles can ruin the smooth finish of your coasters. Stirring slowly reduces bubble formation. If bubbles appear, gently blow over the surface or use a heat gun. These methods help release trapped air.
Achieving the Right Consistency
The right consistency ensures easy pouring and even coverage. The mixture should flow smoothly without being too runny. Adjust your stirring speed to maintain this balance. A well-mixed resin leads to stunning results.
Creating resin drink coasters is an art form. Mastering the mixing process enhances your epoxy resin art projects. Enjoy the journey of crafting unique and beautiful pieces.
Customizing Your Coasters
Creating resin drink coasters offers endless possibilities for customization. Let's explore how you can add colors and embed objects to make your coasters truly unique.
Adding Colors
Color adds vibrancy to your epoxy resin art. You can create stunning effects with a few simple techniques.
Using Pigments
Pigments transform plain resin into colorful masterpieces. Choose from a variety of colors to match your style. Mix pigments into the resin until you achieve the desired shade. Remember to stir slowly to avoid bubbles.
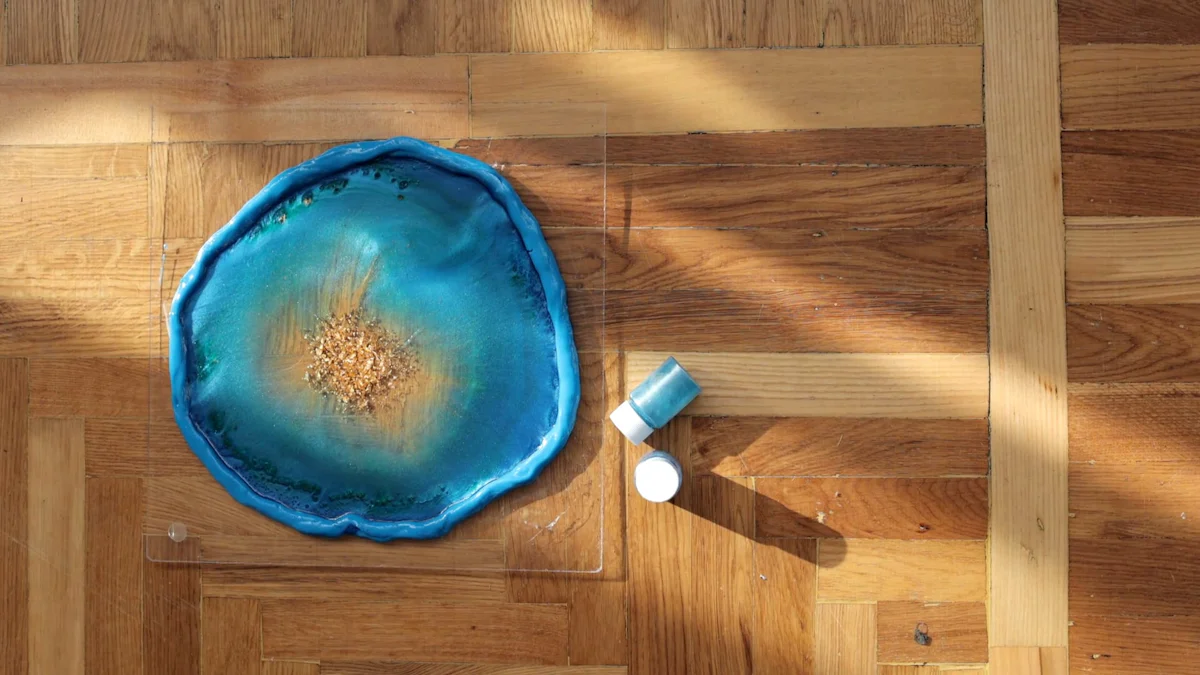
Creating Swirls and Patterns
Swirls and patterns add a dynamic touch to your coasters. Pour different colored resins into the mold. Use a stick to gently swirl the colors together. One artist shared a story about trying to create a ring effect but ended up with a beautiful swirly pattern instead. Experimentation often leads to unexpected and delightful results.
Embedding Objects
Embedding objects in your coasters adds depth and interest. Choose items that reflect your personality or theme.
Choosing Suitable Items
Select objects that complement your design. Dried flowers, sea glass, or small trinkets work well. Ensure objects are clean and dry before embedding them in the resin.
Positioning for Best Effect
Position objects carefully within the mold. Arrange them to create balance and harmony. Press objects gently into the resin to secure them. Some creators find joy in the process, even if the outcome differs from their vision. Embrace the creative journey and enjoy the surprises along the way.
Customizing your resin drink coasters allows you to express your creativity. Each piece becomes a reflection of your artistic vision. Dive into the world of epoxy resin art and craft something extraordinary.
Curing and Finishing
Creating resin drink coasters involves a crucial curing process. Proper curing ensures the durability and beauty of your epoxy resin art. Let's explore how to achieve the best results.
Curing Process
Recommended Curing Time
The Bond Craftor Epoxy Resin Kit requires a specific curing time. Allow the resin to set for at least 36 hours at room temperature. This time frame ensures a solid and clear finish. Avoid moving or touching the coasters during this period. Patience leads to professional-quality results.
Environmental Considerations
Environmental factors play a role in the curing process. Maintain a stable room temperature for optimal results. Avoid areas with high humidity or extreme temperatures. These conditions can affect the resin's clarity and hardness. A controlled environment supports successful curing.
Achieving a Professional Finish
A professional finish enhances the appearance of your resin drink coasters. Follow these steps to elevate your epoxy resin art.
Sanding and Polishing
Sanding smooths out any imperfections on the coaster surface. Use fine-grit sandpaper for gentle sanding. Apply light pressure to avoid damaging the resin. After sanding, polish the surface with a soft cloth. Polishing restores the resin's glossy shine.
Applying a Protective Coat
A protective coat adds durability to your coasters. Choose a clear sealant compatible with epoxy resin. Apply the sealant evenly over the coaster surface. This layer guards against scratches and wear. A protective coat ensures your coasters remain beautiful over time.
Completing the curing and finishing process transforms your resin drink coasters into stunning pieces. Enjoy the satisfaction of creating durable and eye-catching epoxy resin art. Dive into the world of crafting and let your creativity shine.
Troubleshooting and Tips
Creating resin drink coasters can sometimes lead to a few hiccups. Don't worry, though. Here are some common issues and how you can tackle them.
Common Issues
Tackiness and Sticky Surfaces
Tackiness often happens if the resin doesn't cure properly. Make sure you measure the resin and hardener accurately. Mix them thoroughly for at least three minutes. If surfaces remain sticky, consider applying a thin layer of fresh resin. This can help seal and smooth out the tacky areas.
Uneven Curing
Uneven curing might result from temperature fluctuations or improper mixing. Keep your workspace at a stable room temperature. Avoid high humidity or extreme temperatures. Stir the resin slowly and consistently to ensure a uniform mix. Using a heat gun can help pop bubbles and promote even curing.
Encouragement and Sharing
Crafting epoxy resin art is a journey filled with learning and creativity. Here’s some encouragement to keep you inspired.
Personal Anecdotes
Many artists face challenges when working with resin. One artist shared how tiny bubbles kept surfacing despite using a heat gun. The solution involved warming the resin before use. This reduced bubble formation and improved the finish. Learning from these experiences makes the crafting process more enjoyable.
Inviting Readers to Share Creations
Why not share your creations with others? Snap a photo of your finished resin drink coasters. Post it on social media or in crafting groups. Sharing your work can inspire others and build a community of fellow creators. Everyone loves to see unique designs and hear about the creative process.
Remember, every project is an opportunity to learn and grow. Enjoy the process of making beautiful epoxy resin art and let your creativity shine.
Creating resin drink coasters offers a fun and rewarding experience. You can enjoy the process of mixing, customizing, and finishing your unique pieces. DIY epoxy resin art lets you explore endless possibilities. Experiment with colors and patterns to express your creativity. Share your creations with friends or online communities. Feedback and inspiration from others can enhance your crafting journey. Dive into the world of resin art and discover the joy of making something beautiful.